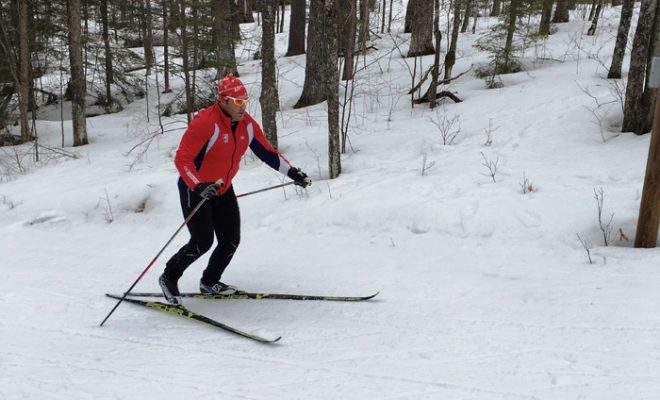
Gear up your classic skiing

CROSS COUNTRY SKIING
WITH CHARLIE DEE AND JOE HAGGENMILLER
FIVE CLASSIC GEARS
Herringbone
Shuffle stride
Kick and glide
Kick-double-pole
Double pole
Charlie Dee: Our past two articles have concentrated on the gear every classic skier uses – the kick and glide – as well as the shuffle stride, a gear for more efficient uphill climbing. This month, Joe, let’s fill in the other three techniques that classic skiers need to gain proficiency with.
Joe Haggenmiller: Let’s start with the herringbone, which many skiers use way too much, the double-pole that isn’t used as much as it should be and the kick-double-pole that is simpler than many people think.
CD: Speaking of the herringbone, after our article about the shuffle stride (February 2018), I heard from several readers who said working on that saved them a tremendous amount of energy they would have wasted on herringboning in last year’s Birkie.
JH: Many intermediate skiers waste time and energy by resorting to the herringbone when they don’t need to. That being said, when the terrain is too steep for the shuffle stride, and skiers need to herringbone, there are ways to make this gear less exhausting and more efficient.
Stand tall when herringboning
CD: The biggest problem – one fish-boners share with skaters – is bending too much at the waist.
JH: Exactly. Skis are in a V position facing up the hill. There is no glide with this technique: the power comes from the inside edge of the ski biting into the snow to get traction. When skiers hinge at the waist and stick their butts out, they’re putting their center of gravity behind their ski boots, forcing their legs to work overtime because they’re dragging all that body weight up the hill.
CD: So, the solution is to stay upright relative to the angle of the hill, striving for a “tall upper body.”
JH: A “tall” body enhances your poling as well as your legs. As you push your right ski into the snow, your left pole is also going into the snow behind your left ski, next to your boot. If your body is bent forward, the only power you’ll get is from your elbow and wrist, and that ain’t much!
CD: What other tips for herringboning?
JH: Once you’ve got the tall body in muscle memory, here are three refinements to work on. Reach your poles forward with the elbow at the same time that you try to extend the reach with your opposite foot forward. The further up the hill that recovery foot can step, the faster you’ll go. Your poling controls the tempo, and if your poling isn’t extended with your elbow reach, you won’t be able to increase your stride length. Finally, concentrate on your lower core muscles doing the work.
CD: As you pointed out to me, if I can’t feel my core initiating the recovery leg stepping up the hill, my hips won’t be activated, so I won’t be using my bigger muscles. Let’s move to the kick-double-pole, sort of an overdrive gear.
Kick-double-pole: an energy saver
JH: A lot more skiers should have this in their toolbox. It’s primarily used in flats or what I call “down-flats,” gradual downhills where you still need to kick, but you can go faster with less effort if you kick on only one side and then double pole. But, it also works on “up-flats,” especially when you have momentum from a downhill coming into the slight uphill.
CD: I don’t know why more people don’t use it. It’s really simple to learn.
JH: Anybody who can kick and glide can do this. Just kick on one side, then double-pole. The rhythm might feel strange for a minute or two, but really, that’s all.
CD: What’s more efficient about it?
JH: Well, double poling is obviously more powerful than single poling. And because of the increased glide you get from that extra power, you don’t need to pole as often.
CD: So it gives your legs a break.JH: Right. What I recommend is to kick five to six times on one side, then switch over to the same amount on the other side. This allows each leg to rest a bit for the next time you need to climb.
CD: I don’t know why, maybe it has something to do with my oft-injured knees, but I always feel more comfortable just kicking with my left ski.
JH: In general, people are more efficient if they alternate, but if one side feels better, simply go with it. It could be the snow conditions, a hill or in your case, strange anatomy. Relax and let your body read the trail.
CD: When those down-flats get steeper, however, it’s time to shift to a pure double-pole.
Double-pole: high hands and active core
JH: Sure. Only the best racers have the balance and confidence to use the double-pole more than a couple times on steep ascents or descents, but most anyone can double pole on down flats.
CD: You’ve done a lot of coaching at Michigan Tech and now with Central Cross Country, so what are your keys to improving double-poling?
JH: High hands and an activated lower core. Almost all skiers would become more powerful and efficient if they worked on getting their hands higher while gliding and preparing for the next double-pole.
CD: I’ve been working on high hands for over a year now, and I see three benefits: They extend the glide, provide time for the core to move forward and enable more power when the poles hit the snow, but I’ve had skiers ask, “How high?”
JH: If you can get your pinky finger up to your eyebrows, you’ll have an ideal double-pole. After 45k, maybe it’s more realistic to expect the index finger to the eyebrow.
Also, think about your elbows flaring out a bit as you raise the hands. The image to visualize here is to think of pounding a nail into a board: you get the most control and power when your hands are close to the center of your body and your elbows out to the side.
CD: Please explain the activated lower core you mentioned as the other key.
JH: Concentrate on your lower core – the muscles in your abdomen behind your belt buckle – firing as you are near to completing the end of your push with the poles.
CD: I see a lot of intermediate skiers who just use their arms, pounding their poles into the snow but then not following through with any kind of core crunch after that.
JH: Right, and those are skiers who have nothing left in the Birkie after Highway 77 and across Lake Hayward. The goal here is to activate this lower core with each pole so your power is not coming solely from your arms.
A way to think about this is that these are simultaneous macro and micro movements: Your chest and your knees are moving towards each other just as your belly button and your crotch are moving towards each other.
CD: What’s the best way to train the lower core so we can utilize it when we need it?
The cat/camel helps
JH: I love the cat/camel yoga pose. On your hands and knees, raise your butt at the same time you’re raising your neck and head. You’re essentially arching your back – hence, the “camel.” Then slowly dip your head down, rolling your chin to your chest while your butt lowers and you rotate your pubic bone forward. Since your back is rounded, this is the “cat.”
CD: I do this daily to loosen my lower back, but how can this help my double poling?
JH: If you do 30 cat/camels at home or in a warming hut before heading out to ski, you’ll be conscious of your lower core. These are precisely the muscles you need to fire when you complete your poling, whether you’re kick-double-poling or just double-poling.
CD: And mastering the double-pole for down-flats will save my legs for when I need them on climbs.
JH: Precisely. So, to improve classic skiing, dedicate practice time to each of these five classic gears, but don’t forget to also practice transitioning from one to another. This is especially true of the shuffle stride.
CD: And if any of our readers don’t have command of all five classic gears, they now know what they need to work on for next season.

