Yoga for the lower back
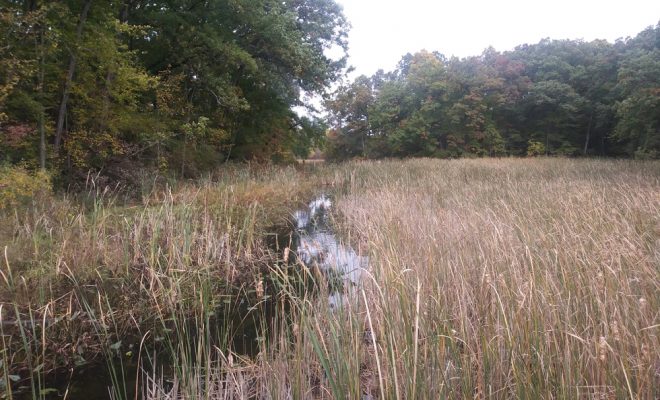
PADDLING
BY REBECCA BARTON-DAVIS
As a paddler, I am very aware of the tension held in my upper body, and I make an effort to work on flexibility for my upper back, shoulders and chest in order to avoid injury and feel limber. I am not so good about stretching the lower part of my body, nor do I enjoy it as much. However, the hamstrings, glutes and lower back are some of the areas that can make paddling the most painful – if I can’t stand my seat or get comfortable in the boat, I leave the water frustrated. On the worst days, I may even experience some numbness in my feet due to limited mobility. By consciously working to improve my flexibility and strength in my lower back and body, I am building a more solid base to support myself, become more comfortable and find myself less stiff in everyday life.
Here are five of my favorite poses for opening up my lower back – in part by releasing tension in my hamstrings, glutes and hips.
Camel
The camel is one of the single-best poses for paddlers – it opens the chest, releases the neck and shoulders and targets the lower back, quads and glutes.
Start by kneeling in a “mini-mountain pose” – shins and toes of flexed feet on the ground, knees, hips, shoulders and head aligned and standing tall. Bring your arms up with fingertips pointing at the ceiling, and shoulders rolled down away from the ears. Backstroke one arm at a time to the lower back, and drop the head and shoulders back as well, letting the jaw relax. If you want more of a bend, bring your fingertips to your heels, but make sure to pull up through the front of the chest using your muscles for support, instead of collapsing your weight backward. Upon releasing from this pose, come forward immediately into a child’s pose for a few recovery breaths.
Fire log
This pose looks simple but is deceptively difficult. The back of the hip and glute get worked in this pose, and it is one of the most uncomfortable (not painful) postures to hold for those with tight hips.
Start the pose by sitting on the mat. Then position your right leg as if you are going to sit cross-legged and the left leg out long. From here, line up the angle of the right leg so it is parallel to the edge of the mat – it looks similar to a number seven when looking from above. Next, stack the left leg on top of the right, with the left ankle resting on the right knee, and the left knee (intending) to rest on the right ankle. Flex both feet to protect the ankles. If your hips are open and this pose isn’t doing anything for you, try folding over the legs with the upper body, walking the hands as far forward as you can while still keeping the sits bones on the ground. Repeat for the right side.
Happy baby
First, lie down with your back on the mat, and bring your knees in toward your chest. With the knees still close to the chest (they may not be touching – it depends on your flexibility), flex feet with soles facing the ceiling. Grab either the ankles or the outside of the feet and actively pull knees into the body out toward the armpits, while keeping the feet active and ankles strong. Once comfortable in the pose, you can pull one foot and then the other with the hands, which will cause a gentle sway side to side – a little bonus lower back massage. This pose is great for the lower back, hips and hamstrings.
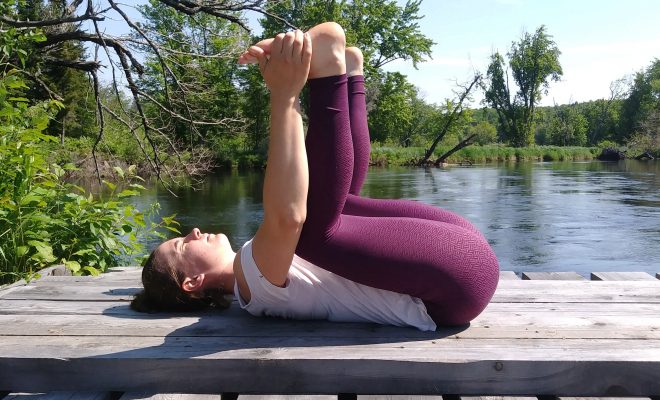
Supine figure 4 (or reclined pigeon)
Lie on your back with both knees bent and your feet on the floor. Gently intend to have your lower back pressed into the mat – if it doesn’t happen that is fine. Have awareness of the lengthening of the spine. Raise your right leg off of the mat, and place the right ankle on the lower left quad, just above the left knee. You should feel some stretching through the right glute, hamstring and hip. To go deeper into the stretch, lift the left foot off the ground, keeping the legs bent. Interlace the hands behind the left hamstring, and gently pull the left leg toward the chest, while thinking about keeping the right knee and leg strong so it doesn’t collapse into the body. You don’t actively need to push the right leg away with your body; just the intention of keeping the leg active will deepen the stretch. Repeat on the other side.
Legs up the wall
This is one of the most passive poses, but it takes time to sink into this simple pose and reap the benefits. It doesn’t take much explaining. First, lay back on the ground with your bum against the wall and feet on the wall. Walk the feet up the wall (or other flat surface) intending to lay the back of the legs on the wall, with the feet pointed at the ceiling. Focus on having the whole back touching the ground and hold for at least 10 breaths.